
Basics
Naming and setup for layers
Set up a new layer and call it ground or something similar. Assign this layer to your physical ground object, making sure it has a collider or mesh collider on it. A mesh collider will work best for single objects that have dips or cliffs.
Adding and placing the grid
Create a grid and sort out the rest of the settings, making sure that the grid type is set to either single cell, chequered, points or lines.
Normally the grid will hover slightly above the terrain in many instances, so move the grid slightly above. Something like 0.015 above your ground object or however much above the ground is desirable for your game.
Auto cell block type and ground layer
Turn on Auto Cell Block and set the type to block both. Set the ground layer to the layer your ground object is in that you set up earlier.
Setting up Automatically
Grid Builder 2 comes built with a preview system for viewing how your grid will block cells. Click on the grid, under Auto Cell Block, hit Create, and then you will see either red or green squares.
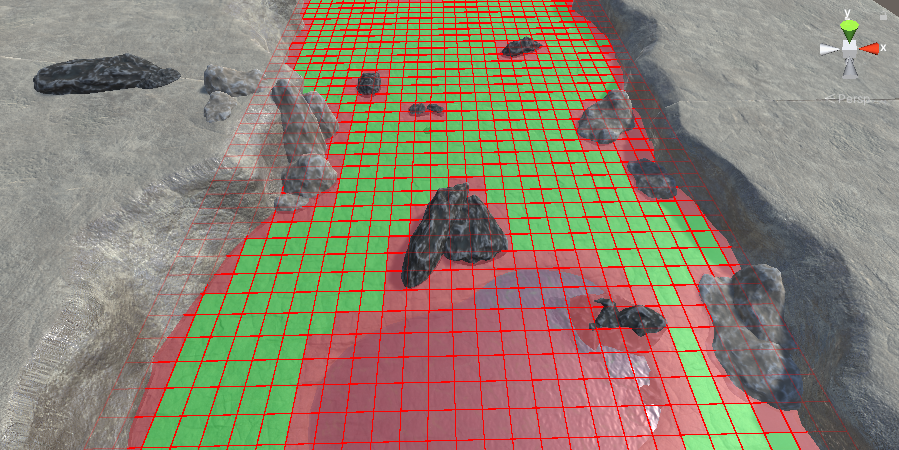
If you hit Auto Update and then try to change some of the parameters, you will notice which squares are changing there available status. The main fields to change are Blocktype, Ground Distance and Above Check Box Size. You can also preview all of these underneath these settings.

When you are happy with which cells will be free and created, remove the preview by hitting the Remove button. The cells you see here, are exactly which ceclls will be created at runtime.
Setting up manually
Setting the ground distance value
Turn on Show Below Rays to see the Ground Distance value. You may need to zoom in a little to see them.
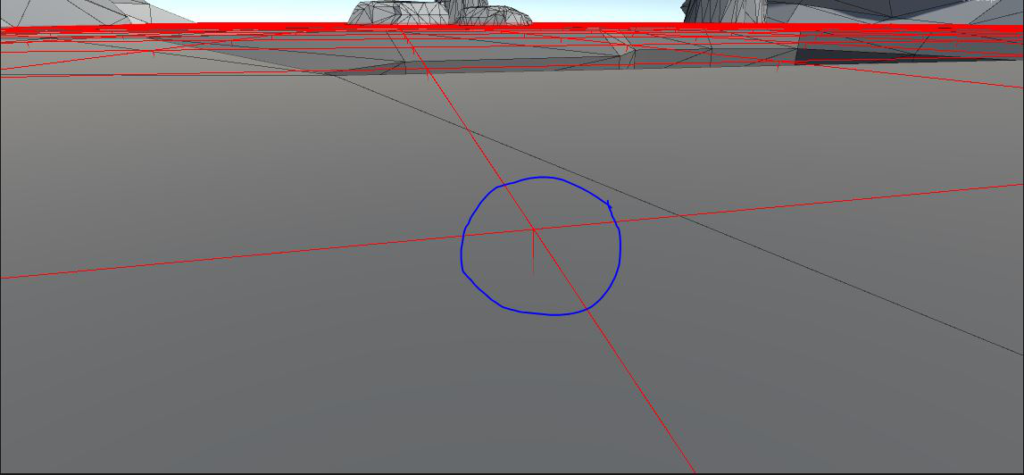
You can see in the picture where the ray hits the ground object and is going through it. This ray should only just be penetrating or going through the ground, so adjust the Ground Distance value to replicate this. If all four corners of a cell touch the ground, a cell will be created, otherwise, it will be blocked.
If you’re having trouble with this, turn on Check Ground Hits to see your most common distance from the grid to your ground. The most repeated debug.log will most likely be how far your grid is from the ground. A value slightly larger than this in Ground Distance will do the trick. If you have no Debug.Logs increase your Ground Distance value further.
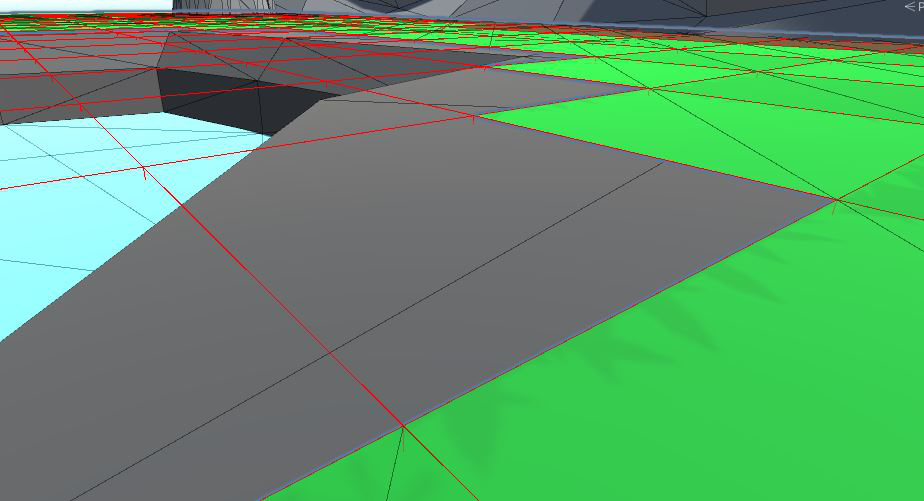
Setting the checkbox size
You can also play around with the Check Box Size and Height creating different spaces around objects like the image below.

Final notes
This takes a little getting used to but it really is quite easy after the first time or two. Take a look at the demo scenes particularly scene 1 and 2 to see how they have been set up.