

Intro
Saving and loading your game or grid is easy and works individually per grid. So you could save and load one grid, while keeping the other from saving and loading at all. Creating a Preconfiguration is also easy, and will be explained in this article.
The Grid ID
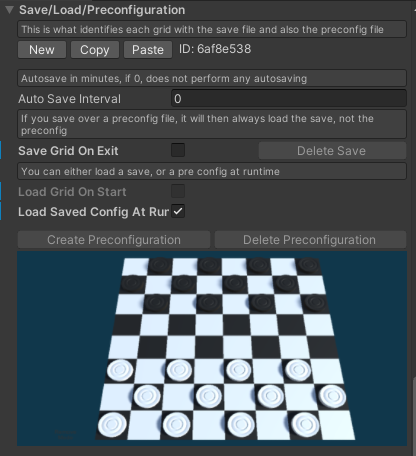
The Grid ID located just under the save and load tab is very important as this is what is used in the file name for saving, loading and preconfigurations. By default, the grid creates an ID on Reset, so when you either manually click reset in the inspector, or add the component manually. You can also click the button New to change the ID. For multiple grids, you will need to use different ID’s for the saving and loading to work correctly.
The Resources folder
All objects are loaded back onto the grid using Resources.Load.
Be sure to have all of your placeable objects in Resources>PlaceableObjects in order for everything to load correctly.
Saving
Saving works by creating a binary file in the users Application.PersistantDataPath with all of the grid objects data. This is located under different places depending on what platform you are using.
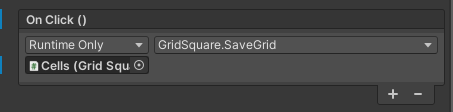
To save your grid data, you will need a method of saving. You can either use the SaveGridBtn located under Prefabs or you can also specify auto saving by putting how many minutes in Auto Save Interval. You can also tick to Save Grid On Exit which will save just before exiting the application. If using a button do not forget to link up the GridSquare you wish to save.
Once the data is saved, be careful to NOT to change the name of your grid as the save data is made up of the grid.name/grid.id.
Loading
Loading is easy and comes the same type of tools as saving. You can load a grids save file through the use of the prefab LoadGridBtn located under prefabs. You can also opt to Load Grid On Start. Be sure that you have not renamed your grid, or changed the grid id since saving your grid, as you will not be able to load it again without those being identical. Again if you are using the button to save, do not forget to link up your GridSquare to the buttons onclick event.
If you find yourself having a different ID, you can simply find your local save file, find the ID in its name (last 8 digits before .data) and copy those last 8 digits, you can then hit Paste next to the grids ID to put that back to what it was.
Preconfigurations
Preconfigurations exist so you as a developer can build your own unique ‘levels’ or areas with objects already built on them. One major difference with these as that they are saved under the PreConfig folder under assets. This is so that the Preconfigurations will ship with the product rather as save files will be ‘created’ by the user.
To create a preconfiguration, you will need to be able to place objects in the scene, so you will need all the relevent components, see how to set this up by following the quick start guide.
Once your scene is ready, select the GridSquare object and run your game. You will notice that the Create Preconfiguration button is now available to click. Once placing down objects where you would like them to appear one start, click the button and you should see a screenshot from your camera saved underneath. You now have your Preconfiguration and can exit the game.
What will load?
Loading a file will depend on what you select to load with which options are checked. Refer to this flow chart for a rundown on how loading is performed.