

Intro
Grid Builder 2 comes with a range of new features, and one of those includes the option to place down objects up to either 5×5 cells or 4×4.
This is all initially set up via the Building component and assigned to a PickObjectBtn prefab and later passed through various classed to keep track of this information.
There is a small amount of set up which is documented throughout this article.
The Placeable object
First of all you will need a prefab, of almost any shape or size. This will be the object you will place down on the grid. To get the most and best results out of Grid Builder 2’s algorithm, you should have access to 3D software as you will be working with pivots and checking physical size. If you do not have access to 3D software, there are a few assets on the Unity Asset Store for moving pivots inside unity. Failing this you could always use the parent transform method change the pivot point of your objects.
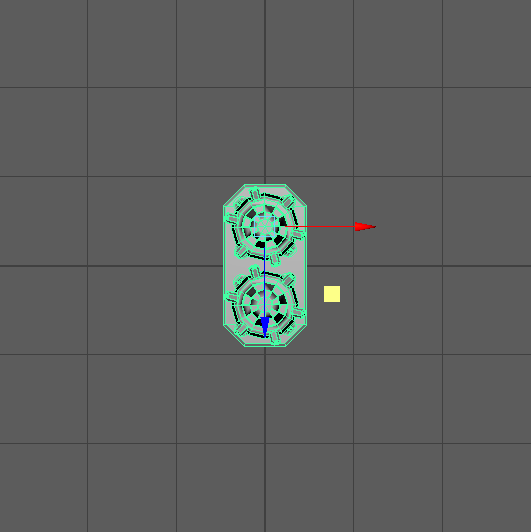
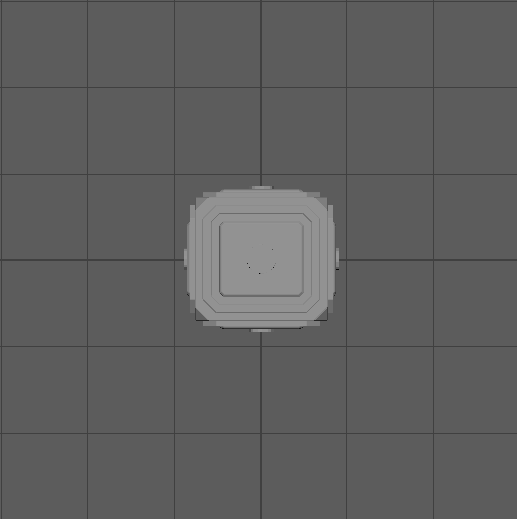
As you can see from the image below, this object roughly occupies a 1×2 grid space. This screenshot is from Maya with units set to meters and working in 1 meter units in Grid Builder 2’s CellSize. You may also notice that the pivot here is moved from the center as we need to match the pivot on the Building component that we add later inside Unity. The pivot should also be on the ‘Floor’ of the object (Y axis).
The PickObjectBtn button
Now you an object to place, drag it into your scene and add the Building component to it. It should look like this.
Make sure your placeable object prefab has a collider on it.
Grab a PickObjectBtn from the prefabs folder and place it in your scene.

Drag your created building with the Building component on it into the Project folder under Resources/PlaceableObjects to create a Prefab. Drag that prefab onto Building slot on the PickObjectBtn you created earlier.
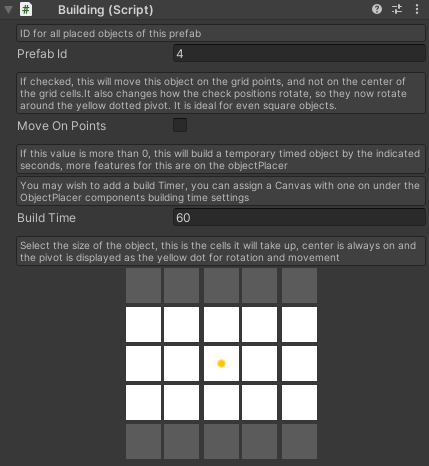
Lets go back onto the Building component on the prefab to see some options here.
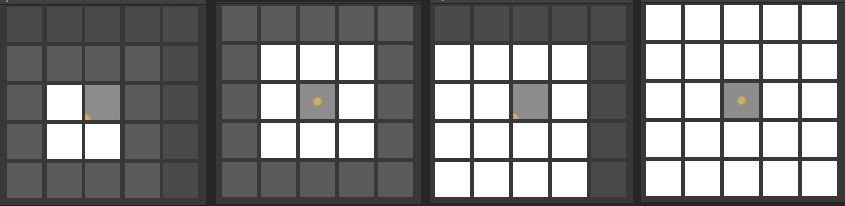
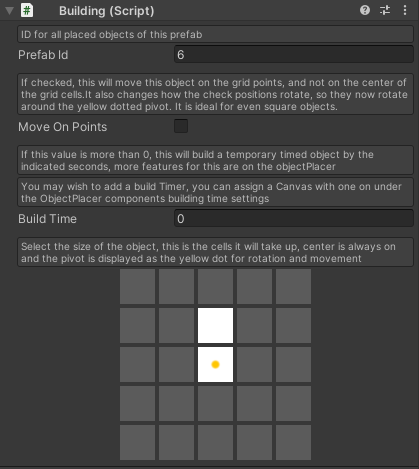
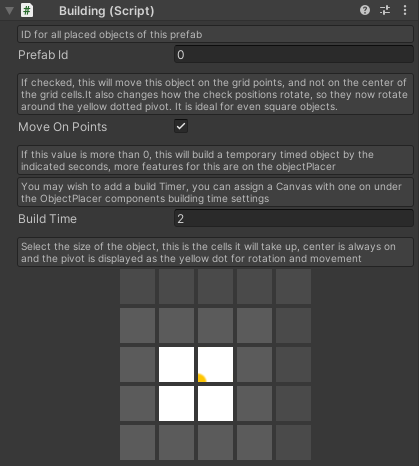
There are a few options here to pick from, most importantly the cell occupancy at the bottom. Some common cell occupancies used in games are shown here and work very well with square or circular objects. Note that all of these have there pivots in the Center.
The center cell is Always active as you have to have at least one cell taken up. As you can see the shape roughly matches the object we have. We have also roughly matched up our pivot, to the pivot represented on the Buildings component (Yellow dot). You may notice that our pictured pivot looks upside down, however this is correct as the pivot in the picture from maya is actually nearer the ‘back’ of the object.
You can also give each different placeable object a different PrefabId as this can be used later for various functions.
The best idea at this stage is to test your object to see how it looks. It can be misleading as to which cells you need to enable as your object could be back to front. You will tell if something is off as the cell marking will not match your shape. If this is the case, try marking the opposite sides cells, trying one or both of the images below.
You should also try rotating the object with ‘R’ to see how that looks. You will notice the cell positions changing on the Building class in the hierachy. This is normal and will reset to your chosen positions on deselect (right-click) or game exit.
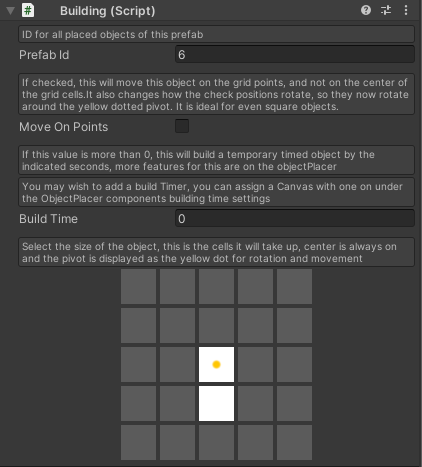
Move on points
This option enables objects when previewed or moved to be moved on the grid points instead of the center of each grid cell.
As you can see from the image, the pivot has now changed to be on the grid point. This should also now match or be close to the objects pivot you intend to place. Please note that when using Move On Points you are limited down to a 4×4 grid for rotation purposes.
Our object from Maya below with matching pivot in the center for better looking rotation and movement.
As you can see from the video below, square objects of even numbers look much better moving on points rather than the center of the grid cells.
Demo videos
Check out the videos for a quick demo on how to do this on a different shaped object
Some of the key things to take from setting up in Maya are –
- Match the pivot with the one you will be using in Grid Builder 2.
- Always place your pivot on the ‘floor’ of your object in the Y axis
- After setting the pivot and checking its size, 0 on all axis to align it to 0, 0, 0 world position.
- Clear all mesh history.
- Freeze transforms.
Some of the key things to take from setting up in Unity are –
- First of all drag your placeable object prefab into the prefab slot of the PickObjectBtn making sure it has a collider.
- Then set the amount of cells the object would take up taking into account whereabouts you set the pivot to be in Maya or other 3D software. Pivot in Grid Builder 2 is the yellow dot in the middle. These pivots should either match or be close for best results.
- After testing in this video, we can see we have set it up upside down. So simply switch the orientation to the other side.